The Hyperledger suite of products has been developed over the years to become the multiple industry standard for enterprise blockchain utilization.
In this post we will cover how to run a four-validator private network on Hyperledger Besu. We'll start by setting up the dev-environment, install Besu, and use IBFT 2.0 (Proof-of-authority) to create the private network.
Set up environment
Install HomeBrew
$ sudo apt-get install build-essential curl file git
$ /bin/bash -c "$(curl -fsSL https://raw.githubusercontent.com/Homebrew/install/master/install.sh)"
$ test -d ~/.linuxbrew && eval $(~/.linuxbrew/bin/brew shellenv)
$ test -d /home/linuxbrew/.linuxbrew && eval $(/home/linuxbrew/.linuxbrew/bin/brew shellenv)
$ test -r ~/.bash_profile && echo eval" ($(brew --prefix)/bin/brew shellenv)" >>~/.bash_profile
$ echo "eval $($(brew --prefix)/bin/brew shellenv)" >>~/.profile
Install Java JDK
$ sudo apt install openjdk-11-jdk
$ export JAVA_HOME=/usr/lib/jvm/java-8-openjdk-amd64
$ echo $JAVA_HOME
$ export PATH=$PATH:$JAVA_HOME/bin
$ echo $PATH
$ java -version
Install Hyperledger Besu using Homebrew
$ brew tap hyperledger/besu
$ brew install hyperledger/besu/besu
Create a Private Network using the IBFT 2.0
Create Directories
IBFT-Network/
  ├── Node-1
  │   ├── data
  ├── Node-2
  │   ├── data
  ├── Node-3
  │   ├── data
  └── Node-4
      ├── data
Create a configuration file ibftConfigFile.json
{
    "genesis": {
        "config": {
            "chainId": 2018,
            "muirglacierblock": 0,
            "ibft2": {
                "blockperiodseconds": 2,
                "epochlength": 30000,
                "requesttimeoutseconds": 4
            }
        },
        "nonce": "0x0",
        "timestamp": "0x58ee40ba",
        "gasLimit": "0x47b760",
        "difficulty": "0x1",
        "mixHash": "0x63746963616c2062797a616e74696e65206661756c7420746f6c6572616e6365",
        "coinbase": "0x0000000000000000000000000000000000000000",
        "alloc": {
            "fe3b557e8fb62b89f4916b721be55ceb828dbd73": {
                "privateKey": "8f2a55949038a9610f50fb23b5883af3b4ecb3c3bb792cbcefbd1542c692be63",
                "comment": "private key and this comment are ignored.  In a real chain, the private key should NOT be stored",
                "balance": "0xad78ebc5ac6200000"
            },
            "627306090abaB3A6e1400e9345bC60c78a8BEf57": {
                "privateKey": "c87509a1c067bbde78beb793e6fa76530b6382a4c0241e5e4a9ec0a0f44dc0d3",
                "comment": "private key and this comment are ignored.  In a real chain, the private key should NOT be stored",
                "balance": "90000000000000000000000"
            },
            "f17f52151EbEF6C7334FAD080c5704D77216b732": {
                "privateKey": "ae6ae8e5ccbfb04590405997ee2d52d2b330726137b875053c36d94e974d162f",
                "comment": "private key and this comment are ignored.  In a real chain, the private key should NOT be stored",
                "balance": "90000000000000000000000"
            }
        }
    },
    "blockchain": {
        "nodes": {
          "generate": true,
            "count": 4
        }
    }
}
Generate node keys and a genesis file
besu operator generate-blockchain-config --config-file=ibftConfigFile.json --to=networkFiles --private-key-file-name=key
Copy the genesis file, genesis.json to the IBFT-Network
directory.
Copy the node private keys to the node directory. For each node, copy the key
files to the data directory for each node.
IBFT-Network/
├── genesis.json
├── Node-1
│   ├── data
│   │    ├── key
│   │    ├── key.pub
├── Node-2
│   ├── data
│   │    ├── key
│   │    ├── key.pub
├── Node-3
│   ├── data
│   │    ├── key
│   │    ├── key.pub
├── Node-4
│   ├── data
│   │    ├── key
│   │    ├── key.pub
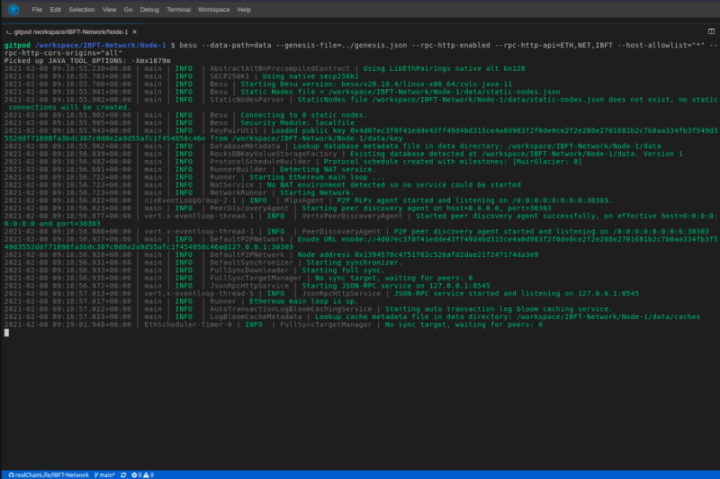
Start Node-1 as the bootnode
besu --data-path=data --genesis-file=../genesis.json --rpc-http-enabled --rpc-http-api=ETH,NET,IBFT --host-allowlist="*" --rpc-http-cors-origins="all"
When the node starts, copy the enode URL which we will use
to specify Node-1 as the bootnode for the next steps.
Start Node-2
besu --data-path=data --genesis-file=../genesis.json --bootnodes=--p2p-port=30304 --rpc-http-enabled --rpc-http-api=ETH,NET,IBFT --host-allowlist="*" --rpc-http-cors-origins="all" --rpc-http-port=8546

Start Node-3
besu --data-path=data --genesis-file=../genesis.json --bootnodes=--p2p-port=30305 --rpc-http-enabled --rpc-http-api=ETH,NET,IBFT --host-allowlist="*" --rpc-http-cors-origins="all" --rpc-http-port=8547
Start Node-4
besu --data-path=data --genesis-file=../genesis.json --bootnodes=--p2p-port=30306 --rpc-http-enabled --rpc-http-api=ETH,NET,IBFT --host-allowlist="*" --rpc-http-cors-origins="all" --rpc-http-port=8548
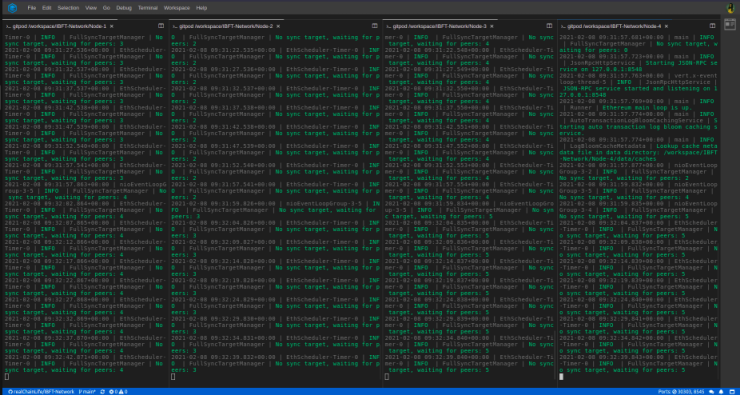
Confirm the Private Network is working
curl -X POST --data '{"jsonrpc":"2.0","method":"ibft_getValidatorsByBlockNumber","params":["latest"], "id":1}' localhost:8545
The result displays the four validators:
{
    "jsonrpc" : "2.0",
    "id" : 1,
     "result" : [ "0x1e326b6da177ede2d3eb6d7247bd9f6901d40234", "0x4aaac297fefe4466ebcb0b23ab90c5f466b11556", "0xa267ead2e91e1673e0943b925176b51d9cd4f6d2", "0xe3e680bc0ff485d1d415a384721f19e0db65fea7" ]
}
In these simple to follow steps you've created a private network that can send transactions over the Ethereum Network. To test this out, you can use this guide on sending transactions with MetaMask.
Besides its high-performance transaction processing capacity, with Hyperledger Besu entreprises can leverage more benefits including:
- Secure application (Dapp) development,
- Enterprise privacy and permissioning,
- Ether mining, & smart contract development.
Additionally, Besu also supports tools like Truffle, Remix,
Web3j and JSON-RPC API methods such as eth, web3,
debug, and miner.